Wednesday, December 21, 2011

Standing Rigging, NOT Going with Sta-Lok

This entry is an update of an update of a previous one describing the standing rigging.  Yes, I changed my mind again.  All the stays will be Dyneema.  The Dyneema synthetic rope offers more strength than the stainless steel,  the lashings between the chain plate distributors and the line terminators will allow the system to load share and to give a bit should the forces on one or two components become excessive.   The Dyneema line and the Colligo fittings offer a significant weight savings up high.  The UV effect on the synthetic line is proven to be minimal out to 5 years. The line likely has full life beyond that mark.  The system is easy to tune in the field and the "deadeye" look and feel goes well with the boat.

Dimensions
The mast is Sitka Spruce and measures 45 ft from the top of the ballast or 39 feet from the main deck. The diameter at the base is 6 3/4 inches. At the 32 foot mark the diameter tapers down to 3 inches. The stays and runners will be 9mm synthetic Dyneema from Coligo.  The gooseneck will be 9 ft 4 inch above the keel step or 40 inches above the main deck or 22 inches above the house top.

Topsail Leader Line
A 9mm Dyneema leader line will attach to the top mast band to support the the bottom half of the topsail luff. A line terminator will connect to the lower eye on the aft side of the mast through a pair of 5/8 inch toggles. The terminator will fit the jaws of a 5/8 inch toggle but not the 1/2 inch toggle.  With two toggles the leader line can align itself on deck transversely and longitudinally.  After the boom is rigged up I will find a good deck location and attachment point that doen't  interfere with the swing of the boom. 

According to Brion Toss this leader line will make it much easier to strike the topsail regardless of wind direction. Brion adds that, “It will keep the sail inboard and bundled up whether it is going up or down. In addition, of course, the jackstay, properly tensioned, allows for a better to-weather shape, without an absurdly tensioned halyard.  In addition to supporting the luff of the topsail the jackstay will be used to set a trysail on hanks.

Headstay
Just below the spinnaker halyard block the 9 mm Dyneema Dux headstay will be attached to the mast on a spliced soft eye against a bronze hound on the aft side of the mast 6 feet below the top of the mast at the 39 foot mark.. On deck  a 1/2 inch distributor will pin to the middle eye of the cranse iron through a 1/2 inch toggle.  The distribtor will be lashed to the line terminator.
  
Upper Shrouds
The upper mast band is positioned 2.5 feet further down at 36.6 feet on the mast. The upper line terminator will pin to the toggle not directly to the mast band so the shroud can line up longitudinally and transversely.   On deck the 1/2 inch chain plate distributor will pin directly to the chain plate.  The distributor and the terminator should be about 18 inches apart, connected by a  4 part 1/4 inch lashing.   The jib halyard block and the upper peak halyard block will be attached to this same mast band.


Backstays
Next at 35 feet another split mast band will support the two 9 mm Dyneema Dux backstays and the lower peak halyard block.  At the top the backstay line terminators will shakle or lash to the aft eyes of the split mast band.  The lower terminator will pin to a whip consisting of  two single blocks one with a becket. The falls will lead to the jib sheet winches.
Forestay
A third split mast band will be positioned four feet three inches further down at the 31 foot level to support the Dyneema Dux forestay on the forward face and the throat halyard block on an aft facing crane. The tang that faces down in the photo below has one 1/2 inch eye for the staysail halyard block.  I will drill a second one above it for the forestay itself.  I will also need a 1/2 inch jaw by jaw toggle to connect the line terminator to the tang.  A single block for the staysail halyard will attach direct to the lower eye.


The shroud will attach directly to the gammon iron with a 1/2 inch line terminator on a jaw to jaw toggle. The toggle lets me  use 1/2 inch fittings instead of 3/4 inch, allows more movement and turns the line terminator so it faces fore and aft.  An exact length forestay eliminates the stack of fittings and lashings that would otherwise prevent the stays'l from falling all the way to deck level when struck. The other option is to put a turnbuckle up at the mast band.  It would be a pain to get at but I am assuming you would only have to adjust one time.  Once the rig is tuned the length of this stay will not change. Any fine tuning of this stay can be done on deck by adjusting the aft lowers and/or the runners.

Lower Shrouds
The lowest band is positioned just under the spreader at the 28.5 foot level on the mast.  The lowers attach to the toggles on a 1/2 inch line terminator.  The port and starboard topping lift lines will fall from two Coligo static blocks lashed to the eye bolts on this same mast band.  On deck the 1/2 inch chain plate distributor will pin to the forward eye of  the chain plate.  The topping lift block will attach to the aft eye on the same chain plate.  And like the cap shrouds the distributor and the terminator for the lowers will be about 18 inches apart and connect with a 4 part 1/4 inch lashing.     


Tuesday, December 20, 2011

Dressing the Mast

Between varnish coats we dry fitted all the mast bands and the new bronze spreaders.   The upper shrouds attach to the toggles on the port and starboard sides of the top mast band. The jib halyard block will hang on the forward face and the upper peak halyard block on the aft side of this same band. Right now we have 7 coats of varnish on and 5 more to go. The first photo shows the sanded mast at the top band.  The next shot was taken after the fog burned off (and it did, just like WD said it would) and we (Jorge) got coat number 7 down.  Above the top mast band the mast is painted white.


The bronze spreaders are attached to the mast just above the bottom band. They sweep aft 3 and up 5 degrees and will direct the 1/4 inch 1 x 19 stainless steel wire upper shrouds to the top mast band.


After Christmas we should be ready to pull wire through the mast and install electrical components.  I still have not figured out how to mount the spreader lights.  Above the spreaders the steaming light will mount to the forward face of the mast.  The steaming light indicates that the vessel is making way under the engine's power.   The Koden radar antenna will be mounted on the mast above the steaming light.  The wire bundle for these three components will exit the mast just below the spreaders.  

Three more wires will have to continue on to the masthead, one for the tricolor/anchor light, one for the wind indicator sensor and another for the VHF radio antenna. The AIS antenna is going to have to live at deck level on the boomkin. 

After the mast is fully dressed we will knock down the tent and step the mast,    Once the standing and running rigging is installed the mast will be unstepped and boat and spars transported to the shipyard. Hope to launch by April but not on the first and not on a Friday.


Friday, December 2, 2011

Mast Carrier Morphs back to Whisper Trailer


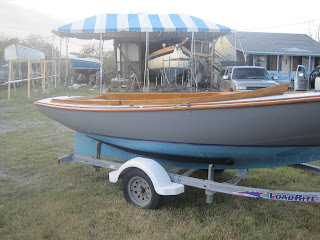
Whisper is a gaff rigged 18 foot Cape Dory Typhon knock-off.  She also sank in Hurricane Ike. Since we are varnishing Rose spars and topsides daily we spread a bit on Whisper. The gel coat responded well to compounding, polish and wax. 

Whisper's trailer has returned from temporary mast carrier sevice.


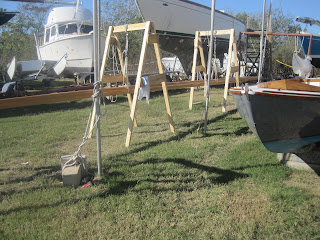
We have pulled Rose out from under the big top another couple of feet so we can install the boom glallows stanchions.  The boom and gaff have 12 coats of varnish. The mast has 4 on and 8 to go. 


Sunday, November 13, 2011

It's the Little Things

Progress is not quite as obvious as in the early stages but certainly more fun as equipment and systems fire up. Last week we started the Beta Marine engine.  Runs like a sewing machine;  it does'nt shimmy and shake at low RPM like the Yamar used to do.


Compass is in, lazerette locker complete, Climma AC and Technautics refrigerator both up and running. The instrutment panel over the chart table is close to completion. The left panel houses the computer monitor. Mounted on the center panel  are battery monitor display, AIS, barometer, Maretron NMEA 2000 display, AC and refrigerator control/display panels and the ipod player.   On the right side the SSB, VHF and computer will mount on three shelves. 


Interior paint and cabinetry work is 90 per cent complete.


The mast is back from major surgery. An error during orginal construction had the mast 13 inches shorter than called for on the spar plan. Simon Hameka used  a clothes pin scarf on the mast base to add 19 inches of length. We will make the final cut with a 2 inch tenon after we step the mast. We will step it once where she sits on the hard and then finally after we launch at Seabrook Shipyard.  Whisper (the baby gaffer) is looking pretty smart as well.


Monday, October 3, 2011

Road Trip

 As I dicussed in an earlier entry the spars were built in Port Townsend, Washington.   At one point I considered hauling the boat to PT to marry it with the spars there, but in the end I decided to finish the project here in on the Gulf Coast. So with the help of a close friend we organized a road trip and hauled the sticks back home.  The return leg took 73 hours, 49 of which were on the road.

In retrospect I should have built the spars here in Texas even if it meant importing the talent. I was too far out of position to supervise construction. 

As a result it took twice as long as originally quoted and because of a misinterpretaion of the drawing or a breakdown in communication the mast is 13 inches shorter than the designed length.  May not seem like much, but trust me, it's huge. 

Some thought was given to re-drawing the sail plan to fit the shorter mast.  That was certainly an option but not a very good one. The sail plan as drawn  is the best one for the vessel.  So having essentially started from scratch and come this far without any major design compromises, why accept less than optimum. The plan
now is to add the 13 inches of length needed to get to
the  45 foot designed length using a  clothespin
 scarf ( Page 214 of "How to Build a Wooden Boat").  I found two 6 foot long 7 x 4 inch Sitka Spruce boards in Maryland and a local shipwright with mast building experience. So we are back  in business.

Getting closer.  I'm now predicting a January splash.     


Sunday, September 18, 2011

Mainsheet Traveler Track Modified

The Harken mains'l traveller track is bent horizontally to conform to the shape of the taffrail. This allows the track to be mounted on the aft trailing edge of the taffrail leaving room for the center single swivel ratchet block with cam cleat to be fix mounted on the taffrail centerline in front of the track.  But the taffrail is also concave which makes the ends of the track lower than the center.  In fact the track ends should be bent upwards so that the mains'l leech does not tighten when the traveler car is released to run downhill. In the photos below you can see the long radius wedges that have been bolted and glued to the taffrail to give the track the proper vertical shape.


Dingy Aboard

The nesting dinghy is a bit too tall to stow on the house top but she fits nicely up forward.  The bow section fits over the scuttle hatch bow facing forward and then the stern section goes on top.  There's enough deck space to go forward on either tack and room to handle head sails or ground tackle.  Grab rails on the dinghy bottom will make for a safer the trip forward.


Saturday, August 27, 2011

The Dinghy's name is "Bud"

In an effort to build a bigger little boat we added head room in the main salon by dropping the cabin sole 3 inches.  A small microwave and 2 burner Wallas diesel fired cooktop replaced the Force 10 propane oven and stove opening up valuable real estate at the foot of the mast where the propane lockers used to live. The Technautics refrigeration system, specifically the compressor, is smaller and lighter than the Glacier Bay model formerly mounted in the lazerette. Moving the head off centerline and replacing the sampson posts with a deck mounted bronze equivalent opens up the forward cabin and sail and anchor lockers.  

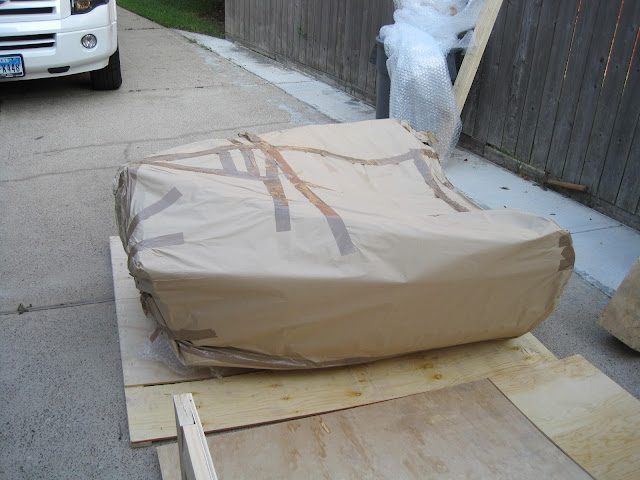
Stowing a big dinghy on a small boat is a challenge.  Nestaway is an English company specializing in nesting prams and stem dinghys that respond very effectively to that challenge.  The one I bought is 9 foot long with a 4 ft 3 inch beam.  Nested the footprint is 5 x 4.25 feet.  "Bud" just arrived and she is a very cool big little dinghy.

Saturday, August 6, 2011

Latest Pics

Hatch Before


Hatch After Teak Guard


Leathered Gaff Saddle


Locker Doors


Sail Locker Port


Sail Locker Starboard


Head